Montage van een PolarisDeel 2 | |
|
The "Red Rascal" rides again. That is very pleasant, and at last I have
enough time now to take up a new project. Well, new.... On 16 February
2007 I exchanged with ' MarcoMazda ' a Rickman Century Sportfairing for and Rickman Polaris
tourfairing. And in April of 2007 I had already undertaken a attempt to
place that fairing on my red CX. But that didn't work then, as you can
read in this motorlog.
But now I have the correct clamps, and I have the fairing and all the
extra things that are necessary, even two extension nuts, given to me
by Theo J. from Bennekom, and an extra headlightplug, from Pjotter.
Wire, tool, everything is there, in short, it is fairing-place-time.
As a first the fairinmg must be wired upo. If ever the fairing must be removed, for something to replace, a lamp or meter, then it is easier to remove the fairing entirely, and with a stekker connection can I simply can disconnect the fairing, and now, at the assembly, it is also easy to have everything in the right place.. | |
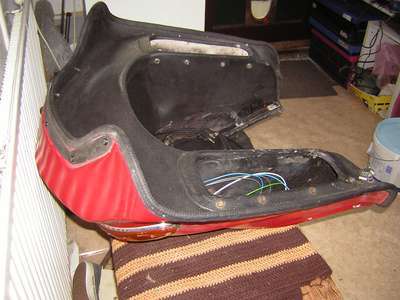 ... fairing wiring ... | |
|
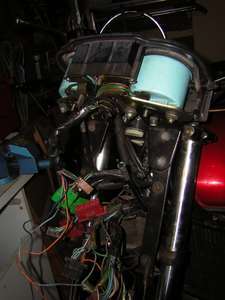
It is time to move on, and that maens into the shed. There, a little
shielded from the wind and rain, I can remove the headlight case and
place the right braces on the CX. So I put the "Red Rascal, just three
weeks after the restart, back into the workplace, again.
I start with disconnecting the headlight, windscreen and meterset. The meterset I need later again, the headlight and windscreen I put aside. When the meterset is removed I can easely unscrew the screws that are holding the headlight case in it's place, and after that, I can take the whole headlight case loose. I have to wrestle with some pieces of electrical cable, before I finally remove the headlight case. | |
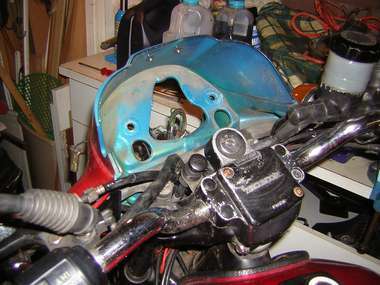 ... remove the meters ... |
 ... wiring ... |
|
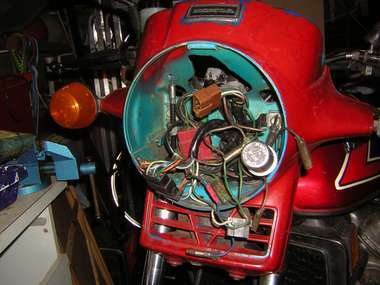
I'm happy to thuink that inside the Polaris more space is available
to put the wires and conmnectors away. Imagine, I have to put al this
inside the headlight housing again.....
| |
 ... loose ends ... |
When I have removed the headlight case, a bungke of wires and plug
and contra-plugs remains. It is hanging there, and it answers directly
the next question: What will I do next? The answer is clear: placing and
arranging the loose cables by putting the meterset onto it new frame.
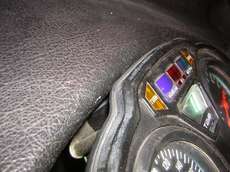
The support frame where the meters have to go fits very well. It takes some effort with the bolds, which must be screwed in the head plate. But finally I manage to do that right. Now I can bring the meters on their spot. It remains a little tumble, there in front of for the legs, but the beginning is there anyway. |
 ... beginning ... |
|
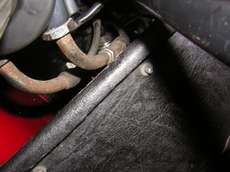
The next step ofcourse are the support brackets. The set that I have
must fit A CX500 according To Marco m. I agrre, for I have seen many pictures
and examples of support brackets that are exactly the same as the two
that I have now. Also I have the extension-nuts, that are meant to be
placed at the lower engine support. Time to place the brackets.
Als eerste neem ik de rechterzijde onder handen. Het is de kant waar ik op dit moment het makkelijkste bij kan. De moer bij het onderste ophangpunt wordt verwijderd, en een koppelmoer wordt ervoor in de plaats gezet en aangedraait. Nu kan het bovenste bevestigingspunt los, een lange bout. Het voordeel van deze werkwijze in natuurlijk dat er altijd wel één van de twee bevestigingspunten vastzit Als de bovenste bout ook los is plaats ik de rechter ophangbeugel, zet de bovenste bout een beetje vast, en doe dan eerst de moer op het onderste bevestigingpunt, bovenop de koppelmoer, goed vast. Daarna de bovenste aandraaien, en dat is één. That number one. The second one is on the side of the CX where 's not much room, But I know the trick now, and this bracket is placed in a rewcordtime. gaat er vlot op. | |
 ... rechter ophangbeugel ... | |
|
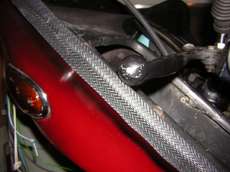
Nu ben ik eigenl;ijk wel heel erg benieuwd hoe het allemaal gaat
passen, en hoe het eruit gaat zien. Dus toch maar even passen. Ik heb
ondertussen wel gecontroleerd of de CX-met-kuip door de schuurdeur kan, en
het kan net niet. Dus de eindmontage zal buiten moeten plaastvinden. Maar
het passen kan best even binnen. Kuip omhoog, en op de beugels laten
zakken, onder het stuur door. Maar wacht eens even......
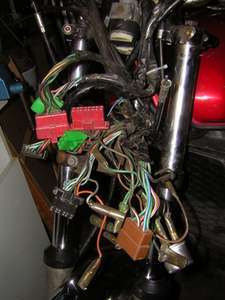
Het past niet. Ik weet direct waar de schoen, of liever gezegt de kuip, wringt. Het stuur van de "Rakker" is een goeie anderhalve centimeter lager dan een standaard CX stuur. Hierdoor loopt het stuur vast op de kuip. De koppelingshendel aan de ene kant, en de bochten van de gaskabels aan de andere kant. Ook de tellerset lijkt niet helemaal te passen. Dit is best vervelend. Wat te doen ?? |
 ... clutch ... |
 ... meterset ... |
 ... the throttle cables ... |
|
I walke around and around and around my "Red Rascal". No thwe fairing
stands neatly onto it's frame, and I cannot see what is wrong, except
those handlebars. I do have, however, two other handlebars, one fully
equipted with cables, but for an other type of CX. Can I use one of those?
No, not possible, for at least the tube from the brake-pump must be extended then. I think about taking the handlebars of the "Blue Angel" but that bike stands ready to sell, and I want to leave it as it is, to avoid having two half-functioning CXs. Rebuild to original is the only option at this point. And remain fairingless. While I replace screw after screw, and push back cable after cable into the cramped space of the headlight housing, I think about what Joke, my wife, said when she saw the CX-with-Fairing: "It looks big, doesn't fit with you, I think". She is often right, that's true, and I recall the fairing-revue from october 26, 2006. And this is the second time that mounting the Polaris won't work. Maybe the Polaris wants to tell me something, and I don't want to listen.......? | |
|
|